Endeavour

Learn to draw Endeavour, the Flame Hero! My Hero Academia drawing tutorial for fans.
Ignite Your Creativity: Drawing the Fiery Hero Endeavour
Have you been awestruck by the sheer power and determination of Endeavour, the No. 1 Hero in My Hero Academia? His blazing Quirk and intense personality have made him a compelling figure in the series. If you’re eager to capture his fiery essence on paper, you’ve come to the right place! This tutorial will guide you through the process of drawing a portrait of Endeavour, focusing on his strong features and the intensity in his eyes. Whether you’re a seasoned artist or just igniting your artistic journey, these detailed steps will help you bring this powerful hero to life. Let’s turn up the heat and start drawing!
Entering the Hero Society: Endeavour in My Hero Academia
My Hero Academia is a smash-hit manga and anime series set in a world where the majority of the population possesses superpowers called “Quirks.” The story follows Izuku Midoriya, a Quirkless boy who dreams of becoming a hero and eventually inherits the powerful Quirk “One For All” from the legendary hero All Might. The series explores themes of heroism, perseverance, rivalry, and the complexities of a society shaped by superpowers. Within this vibrant world, we encounter a diverse cast of heroes and villains, each with unique Quirks and motivations, such as the determined and kind-hearted Ochaco Uraraka and the explosive and ambitious Katsuki Bakugo. The journey of these young heroes as they train and face formidable foes forms the exciting core of My Hero Academia.
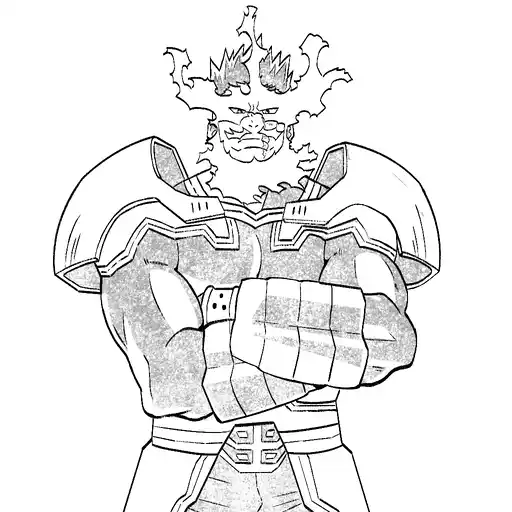
Our focus today is Enji Todoroki, also known by his hero name, Endeavour. For a long time, he held the coveted title of the No. 2 Hero, constantly striving to surpass All Might. Endeavour is a towering figure with a muscular build and a stern, often intense expression. His most defining feature is his Quirk, “Hellflame,” which allows him to generate and control incredibly powerful flames. This manifests visually as flames constantly flickering around his body, particularly his head and shoulders, often forming a fiery mustache and beard. His hero costume has evolved over time but consistently incorporates elements that channel and control his flames. Endeavour is driven by a relentless ambition to be the strongest, a trait that has shaped his interactions with other heroes and his own family, including his son Shoto Todoroki, who also wields immense power. While his methods have been controversial, his dedication to protecting society is undeniable. Drawing Endeavour allows us to capture his raw power and the intensity that burns within him.
Step-by-Step Guide: Drawing a Portrait of the Fiery Hero Endeavour
Let’s break down the process of drawing a portrait of Endeavour, focusing on his determined expression and fiery features. Remember to start with light sketches and gradually add details and darker lines.
Step 1: Basic Head Shape and Guidelines. Begin by sketching a simple oval for Endeavour’s head. Draw a vertical line down the center and a horizontal line across the middle to help you place his features accurately. Add another horizontal line below the center for the placement of his mouth.
Step 2: Defining the Jawline and Facial Structure. Refine the shape of Endeavour’s head, giving him a strong, defined jawline. His face is somewhat rectangular and conveys a sense of power and determination.
Step 3: Sketching the Eyes and Eyebrows. Endeavour’s eyes are usually drawn with an intense and focused gaze. Sketch them using the horizontal guideline. His eyebrows are thick and often furrowed, adding to his stern expression. Pay attention to their angle and thickness.
Step 4: Drawing the Nose and Mouth. Sketch Endeavour’s nose as a strong, somewhat angular shape. His mouth is often depicted as a thin, firm line, reflecting his serious demeanor.
Step 5: Adding the Fiery Elements. This is a key part of drawing Endeavour. Lightly sketch the flames that constantly emanate from his head and shoulders, forming his fiery “mustache” and “beard.” Use curved, dynamic lines to represent the movement and shape of the flames. Don’t make them too uniform; vary their size and flow.
Step 6: Refining the Hairline and Head Shape. Define the edges of his head around the flames. His actual hairline might be partially obscured by the fire, so focus on how the flames integrate with the overall shape of his head.
Step 7: Adding Details to the Face. Go over your initial sketch with darker, more confident lines. Refine the shape of his eyes, nose, and mouth. Add details like wrinkles around his eyes or lines that emphasize his stern expression.
Step 8: Detailing the Flames. Refine the shapes and flow of the flames around his head and shoulders. Add more intricate lines to show the movement and intensity of the fire. Consider how the flames might cast light and shadow on his face.
Step 9: Shading (Optional). To give your drawing depth and dimension, consider adding shading. Focus on areas of his face that would be in shadow due to the lighting and the presence of the flames. Use smooth, consistent strokes for shading. You can also add highlights to the flames to make them appear more vibrant and luminous.
My Hero Academia News: The Heroic Saga Continues!
The world of My Hero Academia continues to expand with new manga chapters and anime seasons, delving deeper into the lives and challenges of our favorite heroes. Endeavour’s journey of growth and redemption has been a significant part of the recent narrative. Stay tuned for the latest updates on the anime and manga to see what the future holds for the No. 1 Hero and the rest of Class 1-A as they face new threats and strive to become even greater heroes.


