Naruto Uzumaki

Draw dynamic Naruto Uzumaki! Step-by-step tutorial for anime fans and artists.
Unleash Your Inner Ninja Artist: Drawing Naruto Uzumaki in Motion
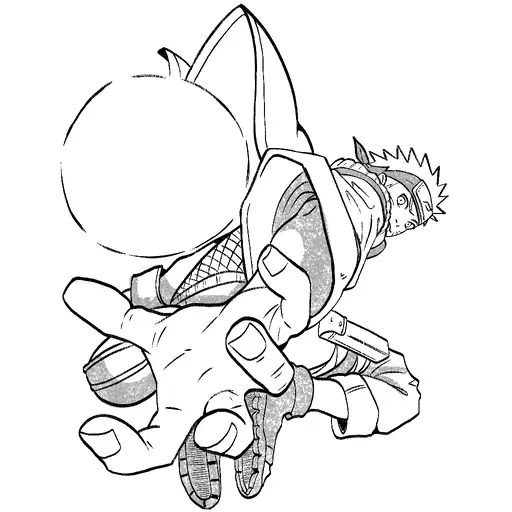
Believe it! You’re about to embark on an exciting journey to capture the boundless energy and iconic look of Naruto Uzumaki, the knucklehead ninja who never gives up, from the legendary anime series Naruto and Naruto Shippuden! This tutorial will guide you through the steps of drawing Naruto in a dynamic action pose, full of movement and his signature enthusiasm. Whether you’re a long-time fan eager to express your love for the series or an aspiring artist looking to tackle an exciting subject, grab your drawing tools and let’s bring Naruto to life!
Entering the World of Naruto and the Unpredictable Hero
Naruto is a globally beloved manga and anime series that follows the adventures of Naruto Uzumaki, a young ninja from the Hidden Leaf Village (Konohagakure). Ostracized by his community due to the powerful Nine-Tailed Fox spirit sealed within him, Naruto dreams of becoming the Hokage, the village leader, to earn their respect and recognition. The series chronicles his growth, his bonds with his teammates Sakura Haruno and Sasuke Uchiha under the guidance of their sensei Kakashi Hatake, and their battles against formidable foes. Naruto Shippuden continues the story as Naruto grows older and faces even greater threats to the ninja world, exploring themes of friendship, perseverance, prejudice, and the cycle of hatred. The series’ enduring popularity stems from its compelling characters, thrilling ninja battles, and its ability to blend humor with moments of profound emotion. From his rivalry with the talented Sasuke to his unwavering loyalty to his friends and his determination to protect his village, Naruto’s journey resonates with audiences worldwide. His interactions with other key characters like the wise Jiraiya, the strong-willed Tsunade, and the enigmatic Itachi Uchiha shape his development and the course of the entire series. Learning to draw Naruto in a dynamic pose allows us to capture the essence of his energetic spirit and his relentless drive.
Step-by-Step Guide: Drawing Dynamic Naruto Uzumaki
In this tutorial, we will focus on drawing Naruto Uzumaki in a dynamic leaping pose, capturing his signature energy and movement. Follow these steps to bring the Seventh Hokage in the making to your sketchbook:
Step 1: Sketching the Core Action Line and Basic Forms Begin by drawing a curved action line that represents the flow of Naruto’s dynamic pose. This line will be the spine of your drawing, indicating the direction of his movement. Lightly sketch simple shapes like circles and ovals to represent his head, torso, and the general placement of his limbs in the action pose. Focus on conveying a sense of energy and motion in these initial shapes.
Step 2: Defining the Torso and Limb Positions for Movement Refine the basic shapes to better define Naruto’s torso and the positions of his arms and legs. Consider the angles and bends in his limbs to emphasize the feeling of a jump or a powerful movement. One arm might be extended forward for balance or to prepare for an attack, while the other could be bent. Similarly, position his legs to show him in mid-air or launching forward.
Step 3: Outlining the Head and Facial Guidelines in Perspective Lightly sketch the shape of Naruto’s head, taking into account the angle created by his dynamic pose. Draw the vertical and horizontal guidelines on his face to help you place his features accurately, considering the perspective. These guidelines will ensure his eyes, nose, and mouth are correctly aligned.
Step 4: Adding Naruto’s Distinctive Facial Features and Hair Now, bring Naruto’s unique features to life. Sketch his determined eyes, paying attention to their shape and the placement of his pupils. Draw his characteristic whisker marks on his cheeks. Sketch his mouth, which might be open in a shout or set in a determined expression. Finally, sketch his iconic spiky blonde hair, paying attention to the volume and the way it flows with his movement. Don’t forget his Konoha headband, positioned on his forehead.
Step 5: Drawing the Details of His Clothing and Hands Sketch the details of Naruto’s clothing. In his younger years, he often wore an orange and blue jumpsuit. Consider how the fabric would move and fold in a dynamic pose. Sketch the basic shapes of his hands, indicating if he’s making a fist or preparing for a jutsu. Simplify the hand shapes at this stage, focusing on their overall form and position.
Step 6: Refining the Linework and Adding Key Details Go over your initial sketch with darker, more defined lines, refining the shapes of Naruto’s body, clothing, and facial features. Add details like the folds in his clothes, the texture of his hair, and the details of his headband. Erase any unnecessary guidelines from your initial sketch.
Step 7: Introducing Shading and Optional Coloring for Depth To give your Naruto drawing depth and dimension, begin adding shading. Consider the direction of light and apply shadows to areas like under his hair, along the folds of his clothing, and the contours of his body. If you choose to color your drawing, use Naruto’s vibrant color palette to make your artwork pop. His bright orange and blue are key to his recognizable look.
Fun Fact: Naruto’s Unwavering Spirit – An Inspiration!
A fascinating aspect of Naruto’s character is his incredible resilience and refusal to give up, no matter the odds. This determination has not only inspired countless viewers but is also a core theme of the entire Naruto series, emphasizing the power of perseverance and belief in oneself.
Ready to share your dynamic Naruto artwork? Join our vibrant community of anime artists on Discord and connect with fellow fans! https://discord.gg/qcqCSH4FvX


